Add Raylib as a dependency for your project
Raylib is a graphics library we will be using to write 2 or 3 dimensional games in our classes. Because this is such a common thing to start with, I put all the directions on how to configure a new raylib project into this tutorial.
1. Create a new D project
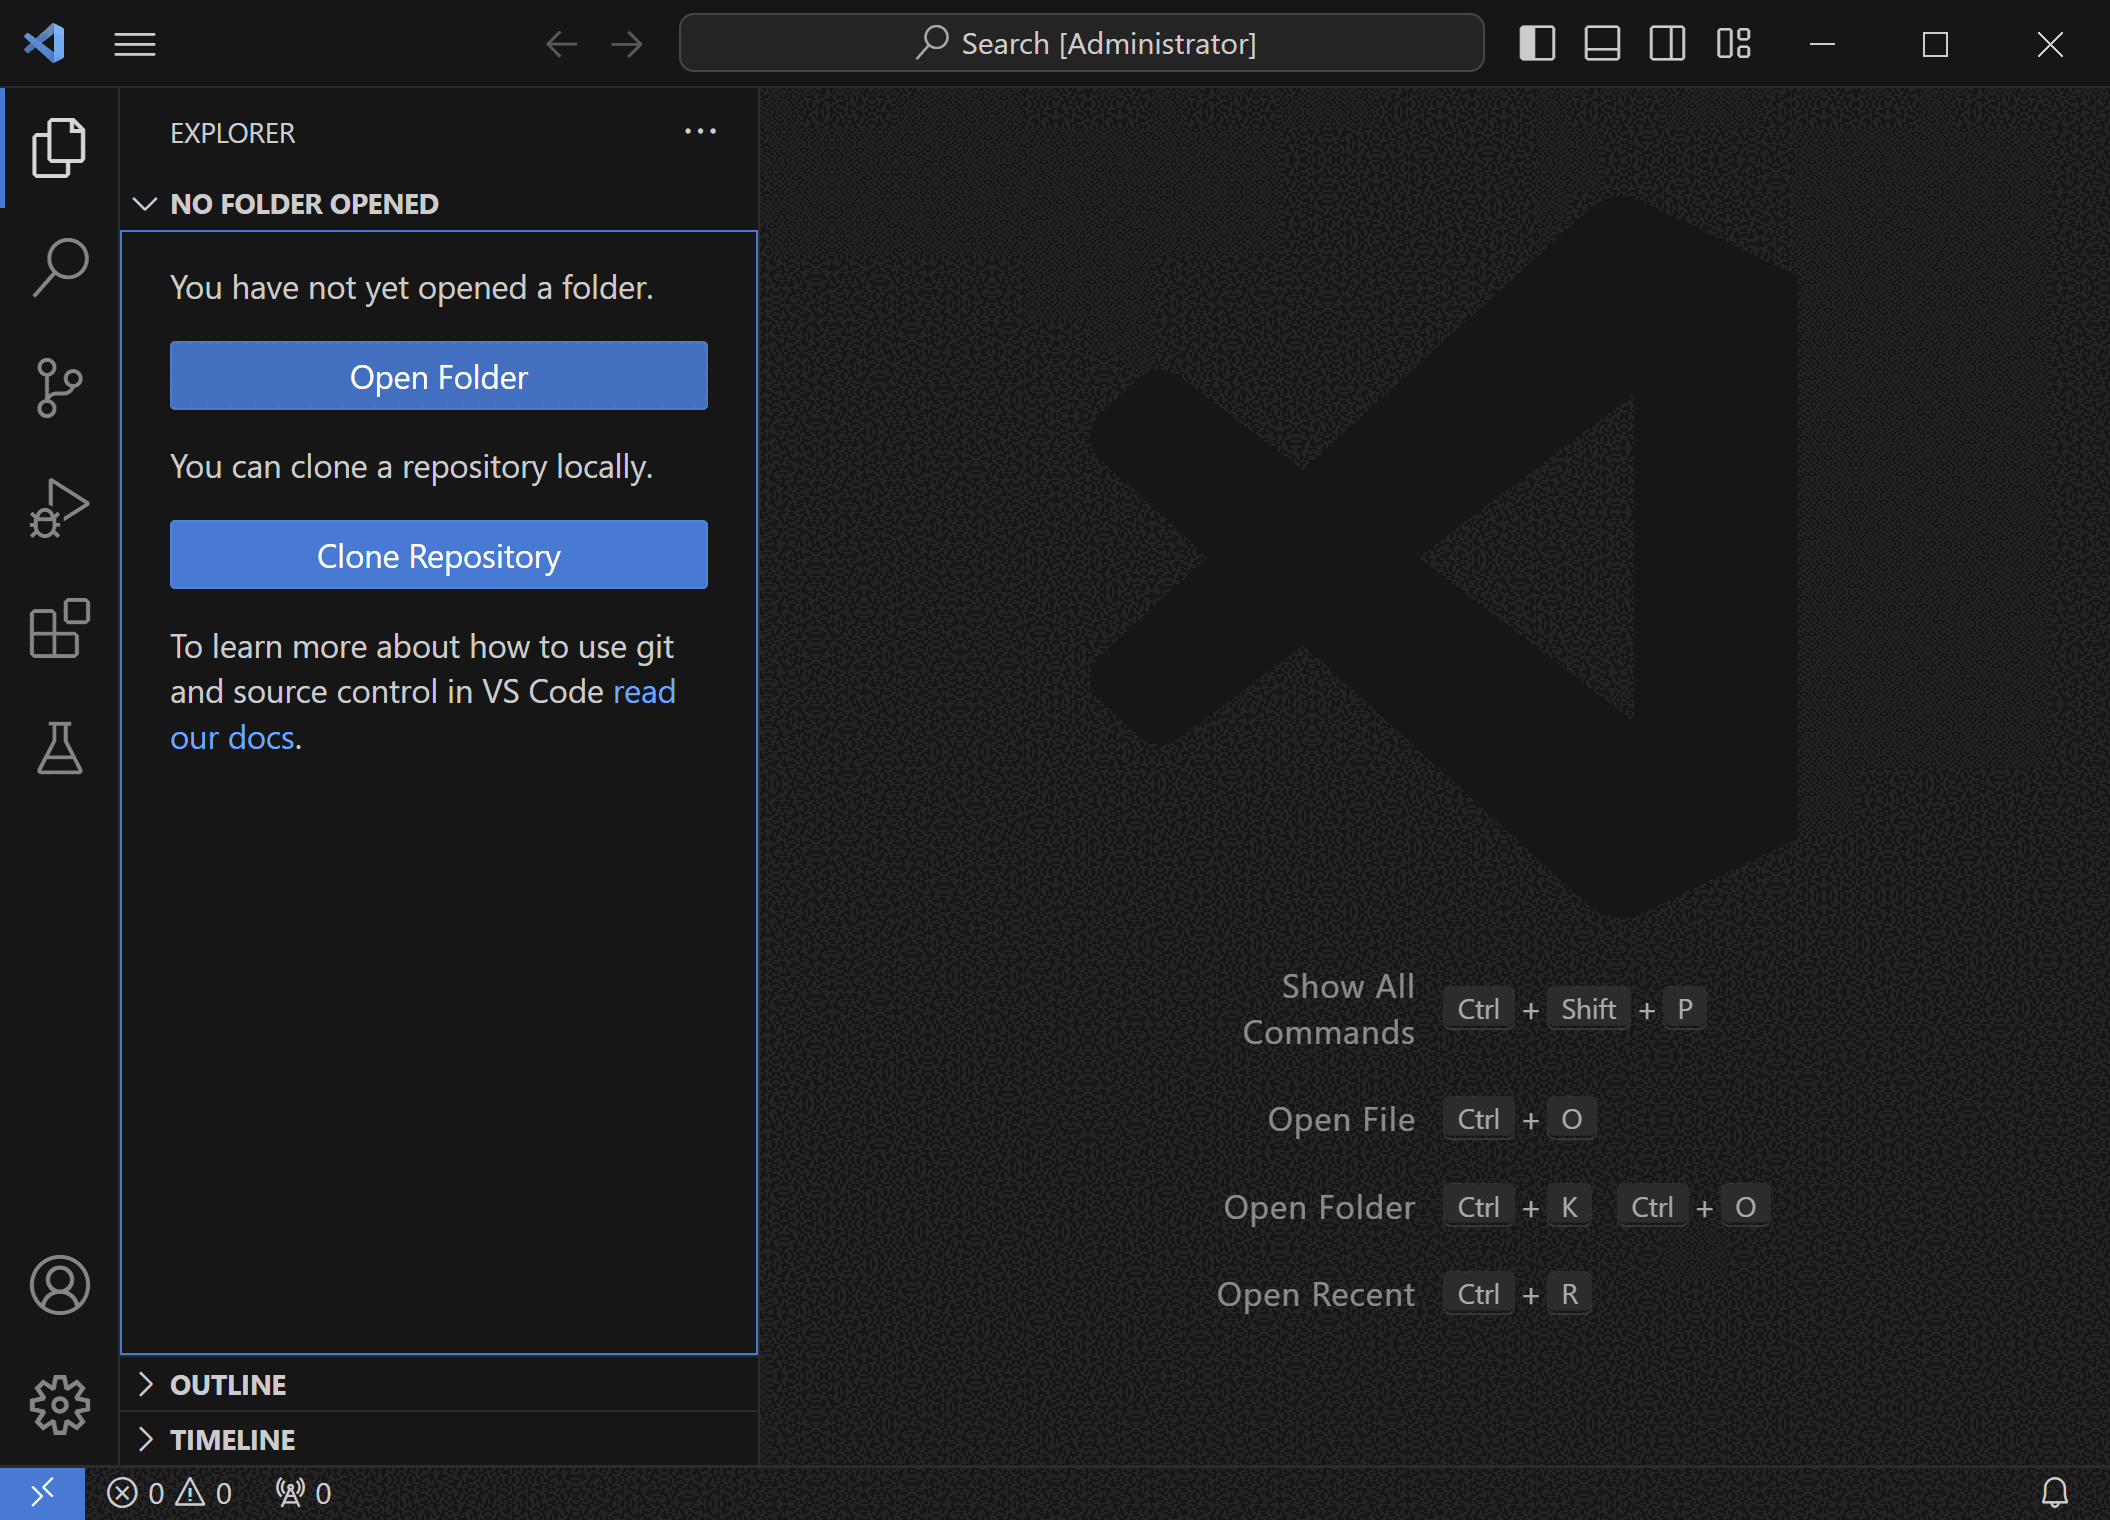
To set up the project, you need to create a project directory. We can do this directly in Visual studio code. Open the file browser, and then click "Open Folder".
2. Make a new folder and open it
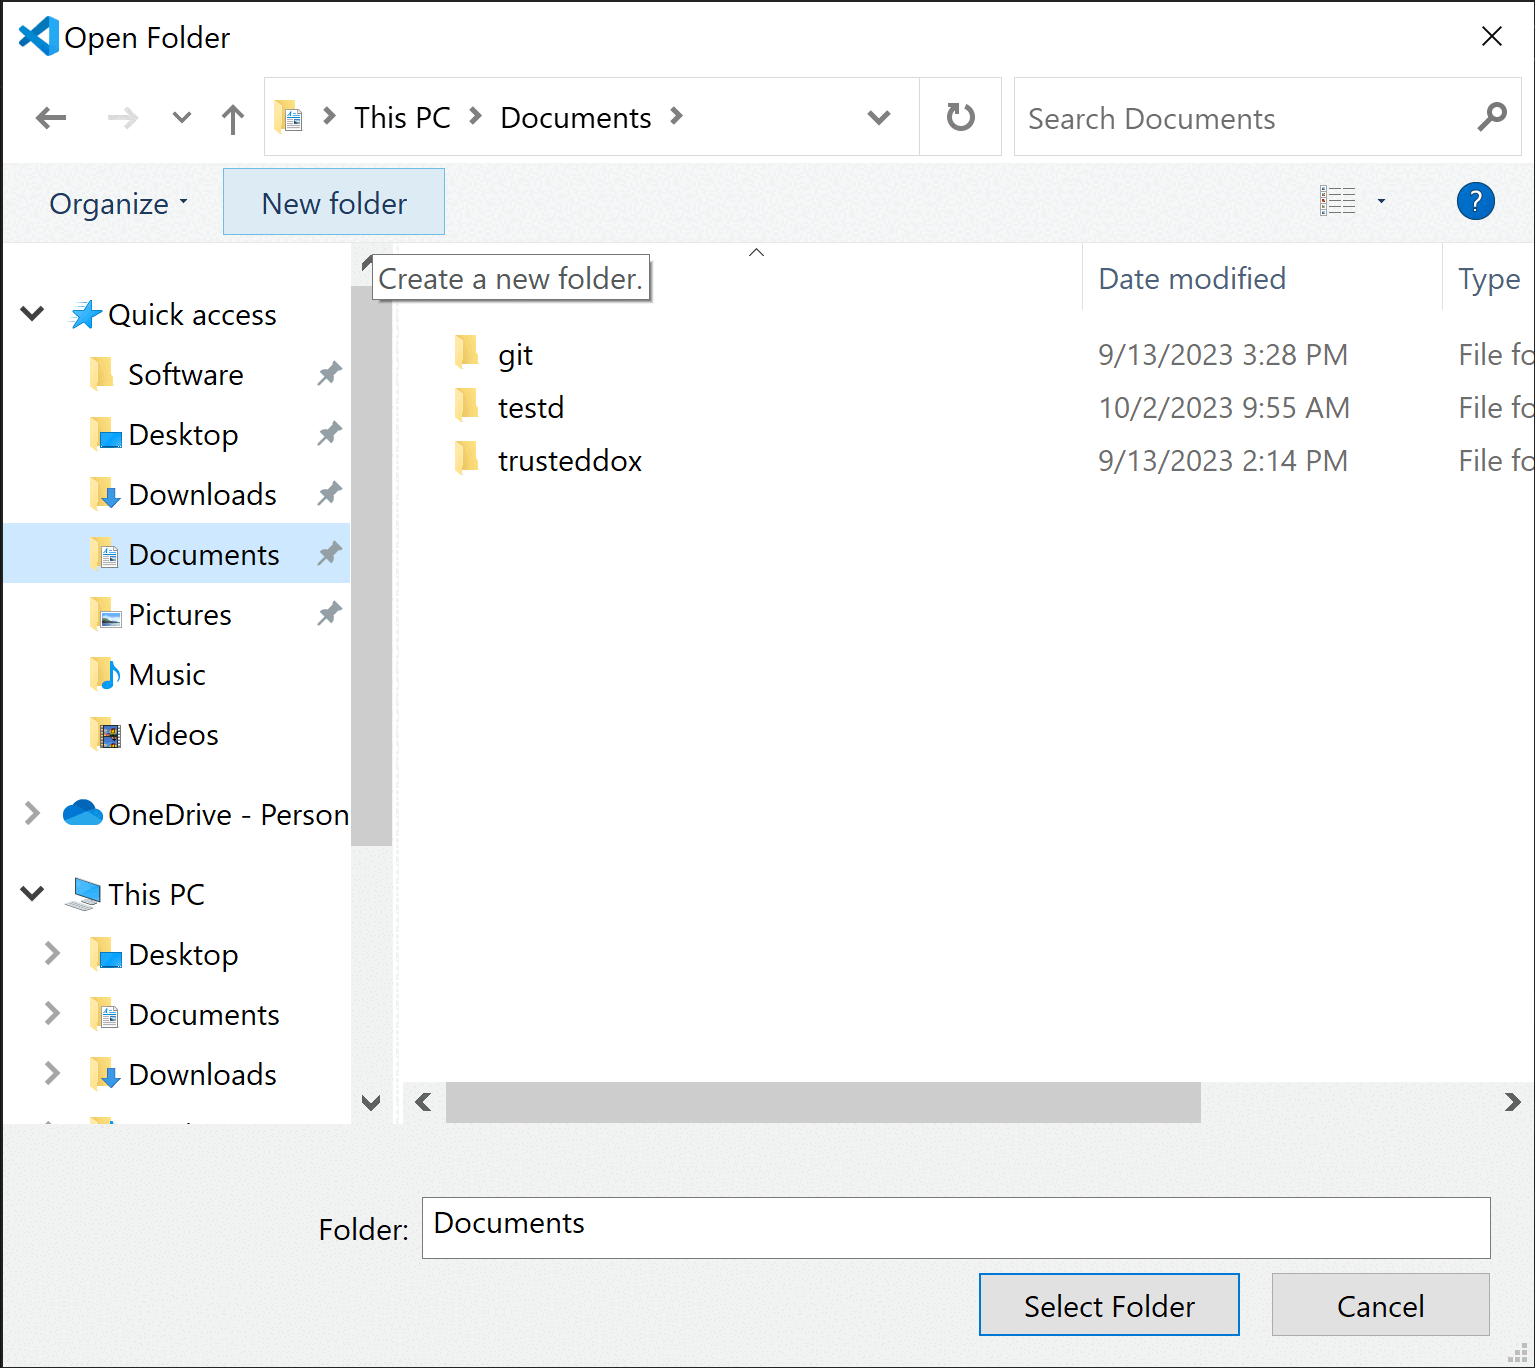
Using the "New Folder" button as highlighted, make a new folder. For this demo, I will call it "raylibtest"
3. Initialize the D project
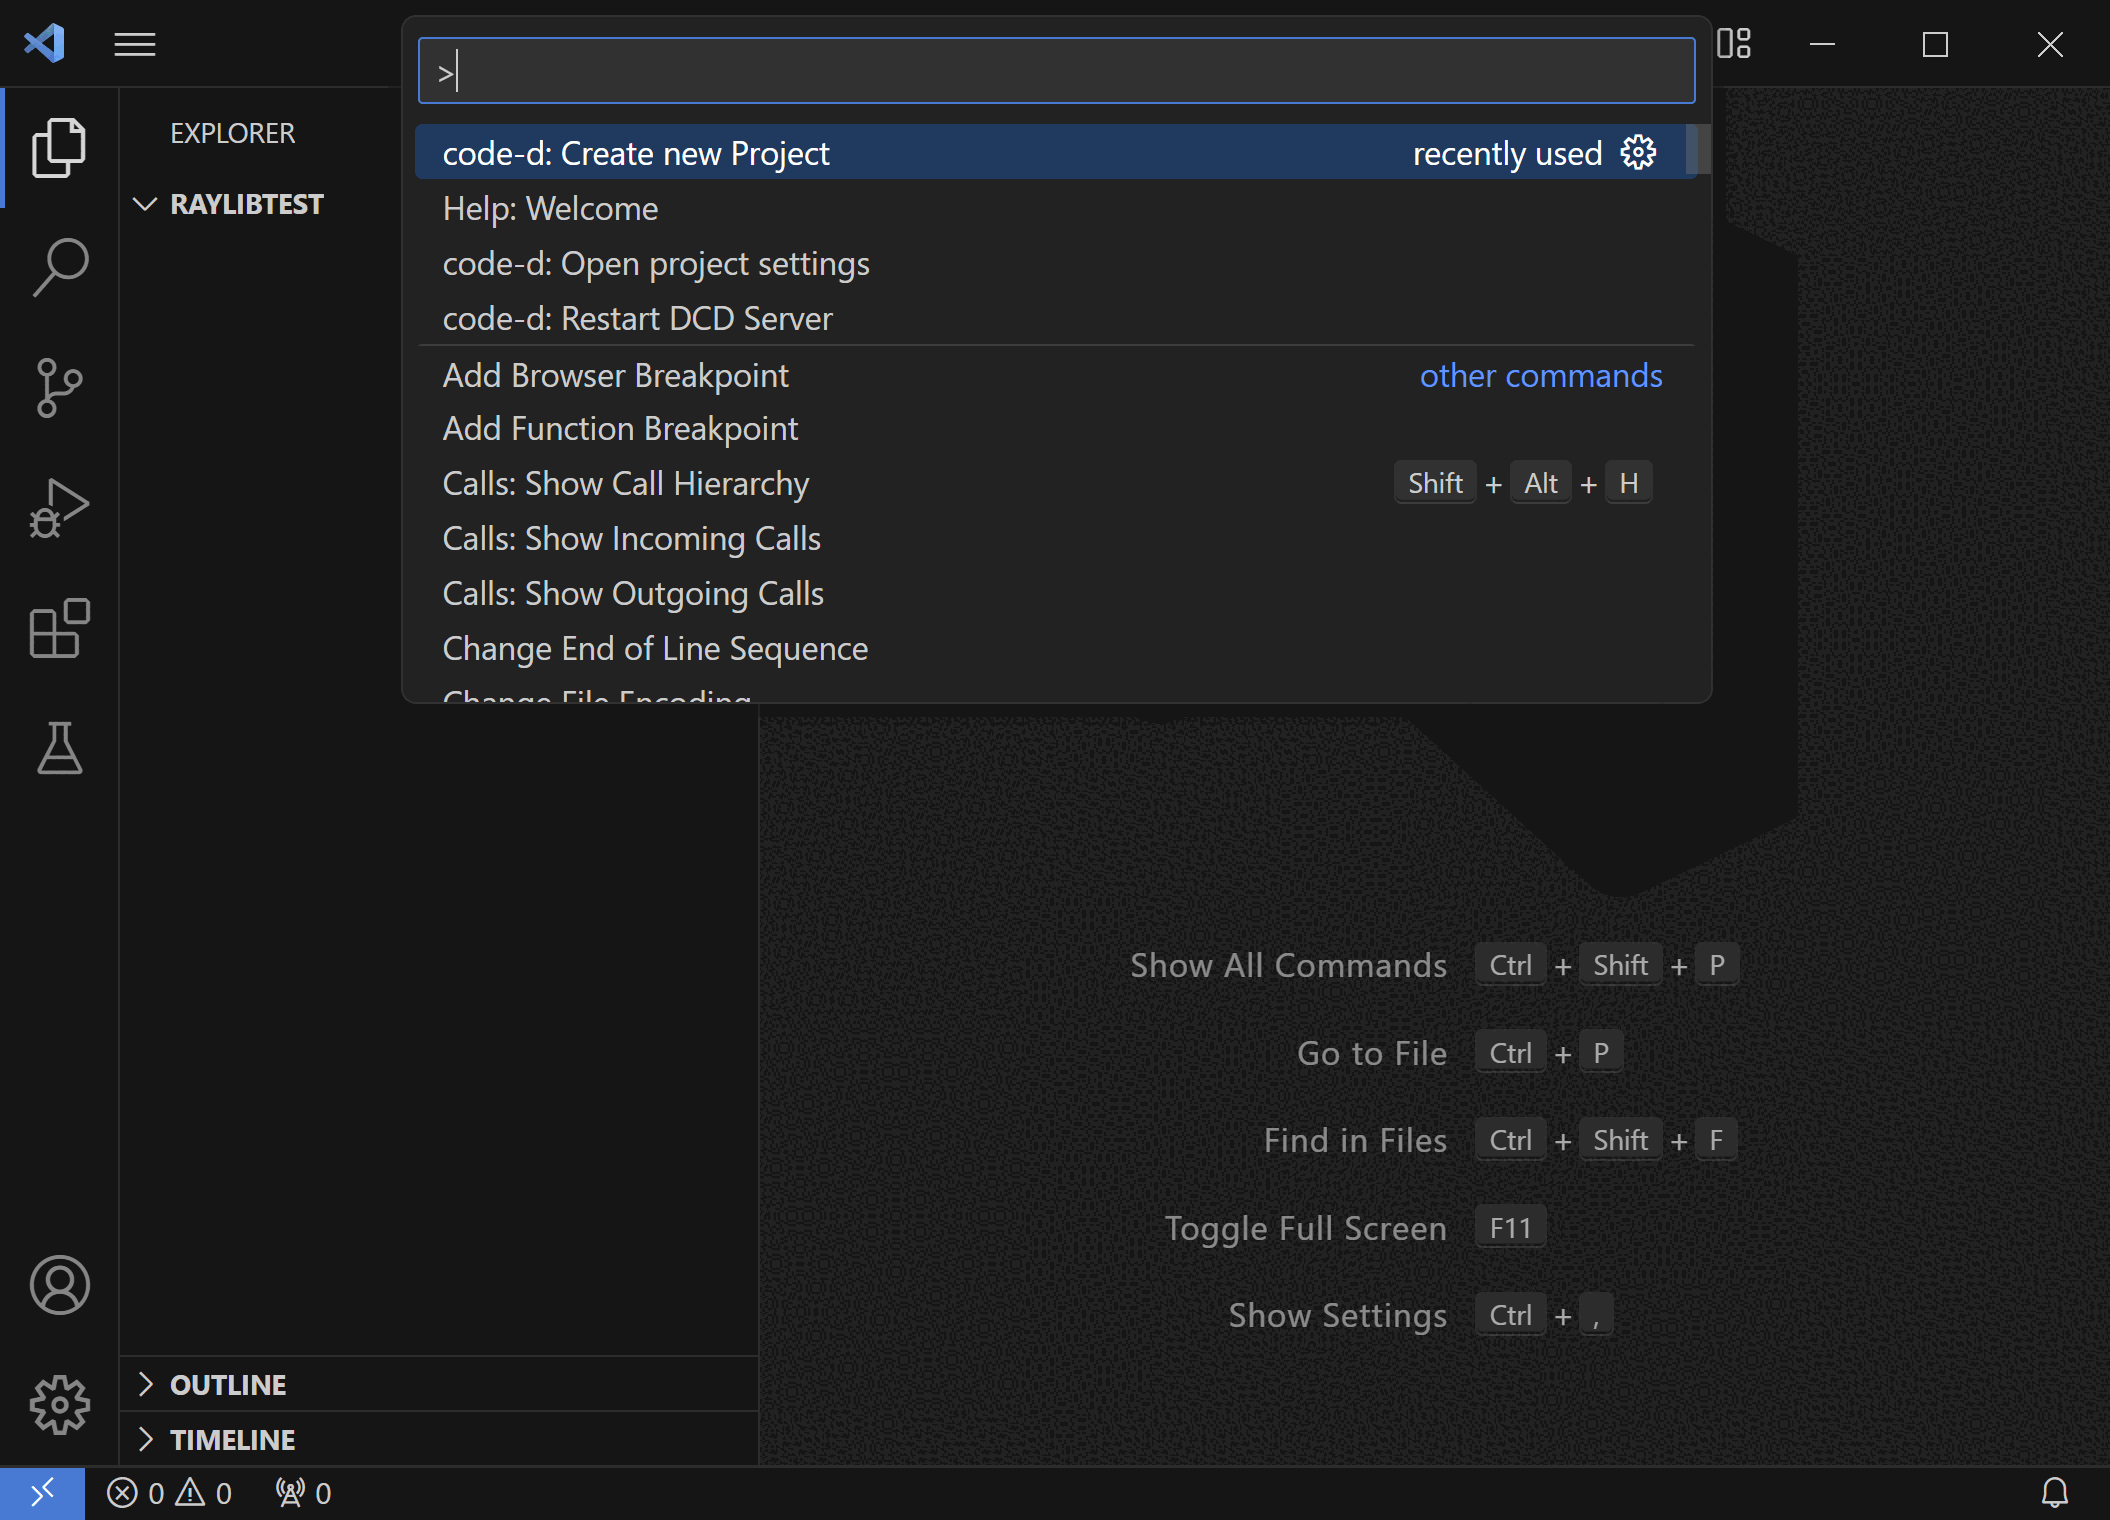
Now we will ask the D language extension (code-d) to initialize the folder for building. In VSCode, the key sequence for bringing up the "Command palette" or list of commands is SHIFT-CONTROL-P. Press all of those keys together, and a list of commands with a search bar appears. Type in "code-d new", and it will bring up the command to create the empty project. After picking that, select "Empty Console Application".
4. Add the raylib-d dependency
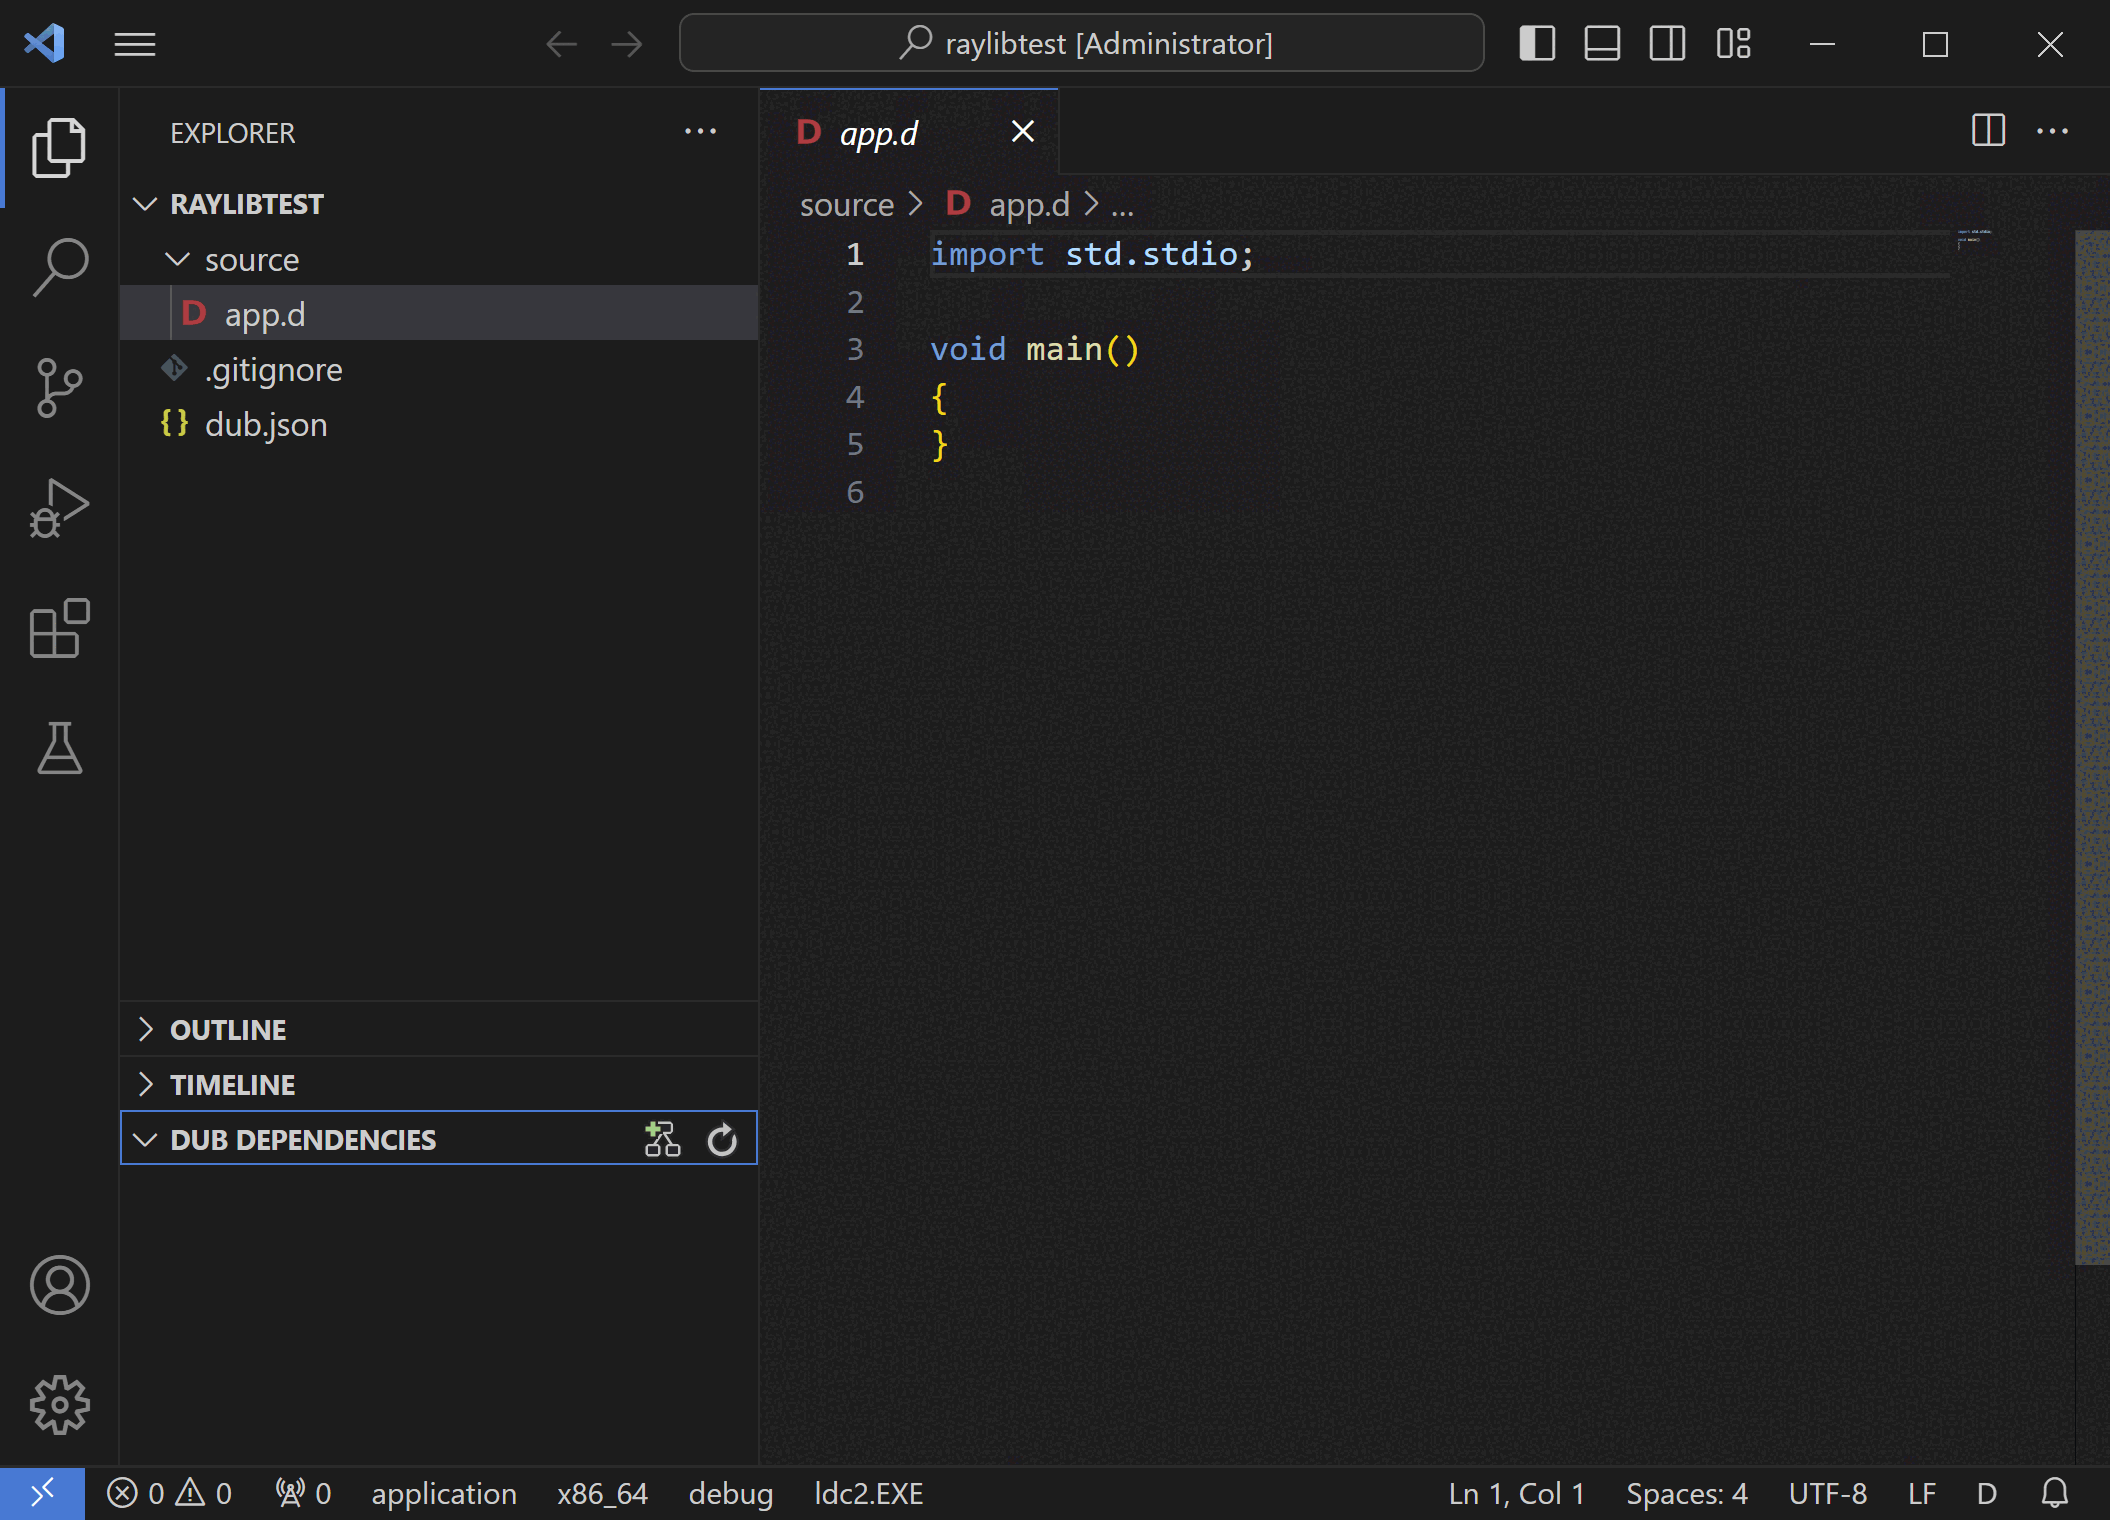
Select the "app.d" file as shown. When the code-d extension has fully loaded, you will see in the bottom left an item for "Dub dependencies". Click on this item, and you will see a button with a green "+". Click that button
This will bring up a search box at the top of the screen. Type in "raylib", and you will see the first dependency is "raylib-d". Click that one, and it should now be added.
5. Build your program once (optional)
We need to build the program once to get the dependency to download. Once you have done this for the first time, you will not have to do it again for any other raylib projects.
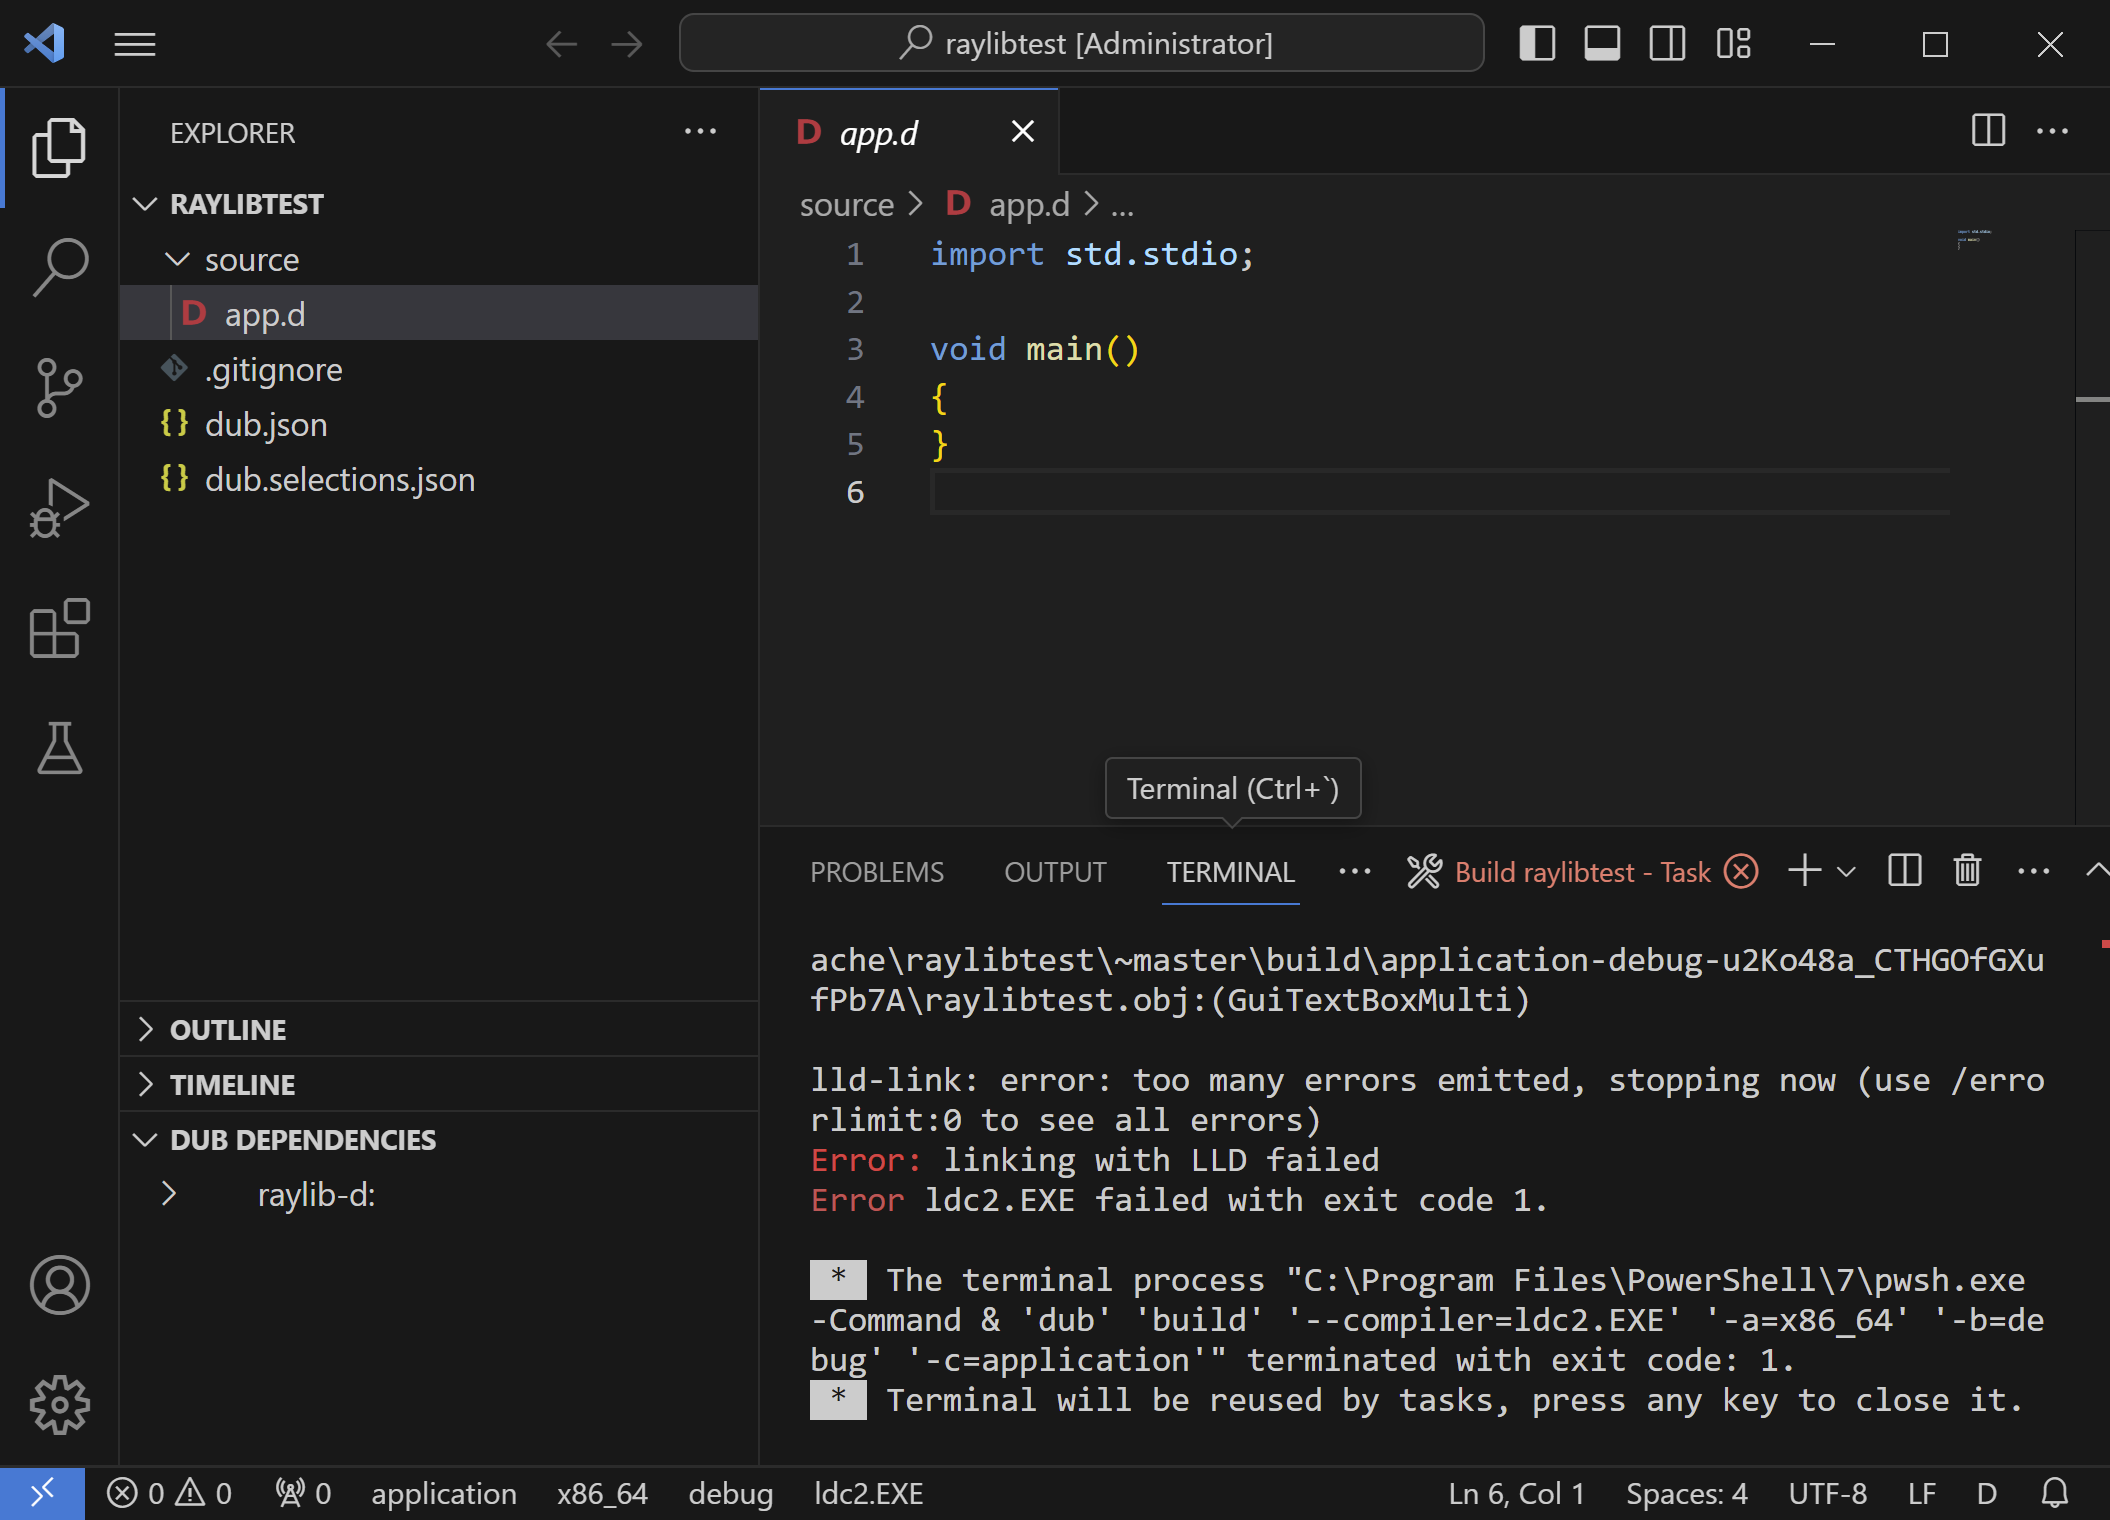
This is done in VSCode using SHIFT-CONTROL-B. This will bring up the build menu. Select the "build and run" command. Note that this will fail because we haven't installed the raylib library yet.
6. Install raylib library
To install the library, we need to type in a command to run the installation. First, we need to start a terminal. The command to start a terminal is SHIFT-CONTROL-`. That key is on the upper left side of your keyboard, and is called a backtick. The key looks like this:
`
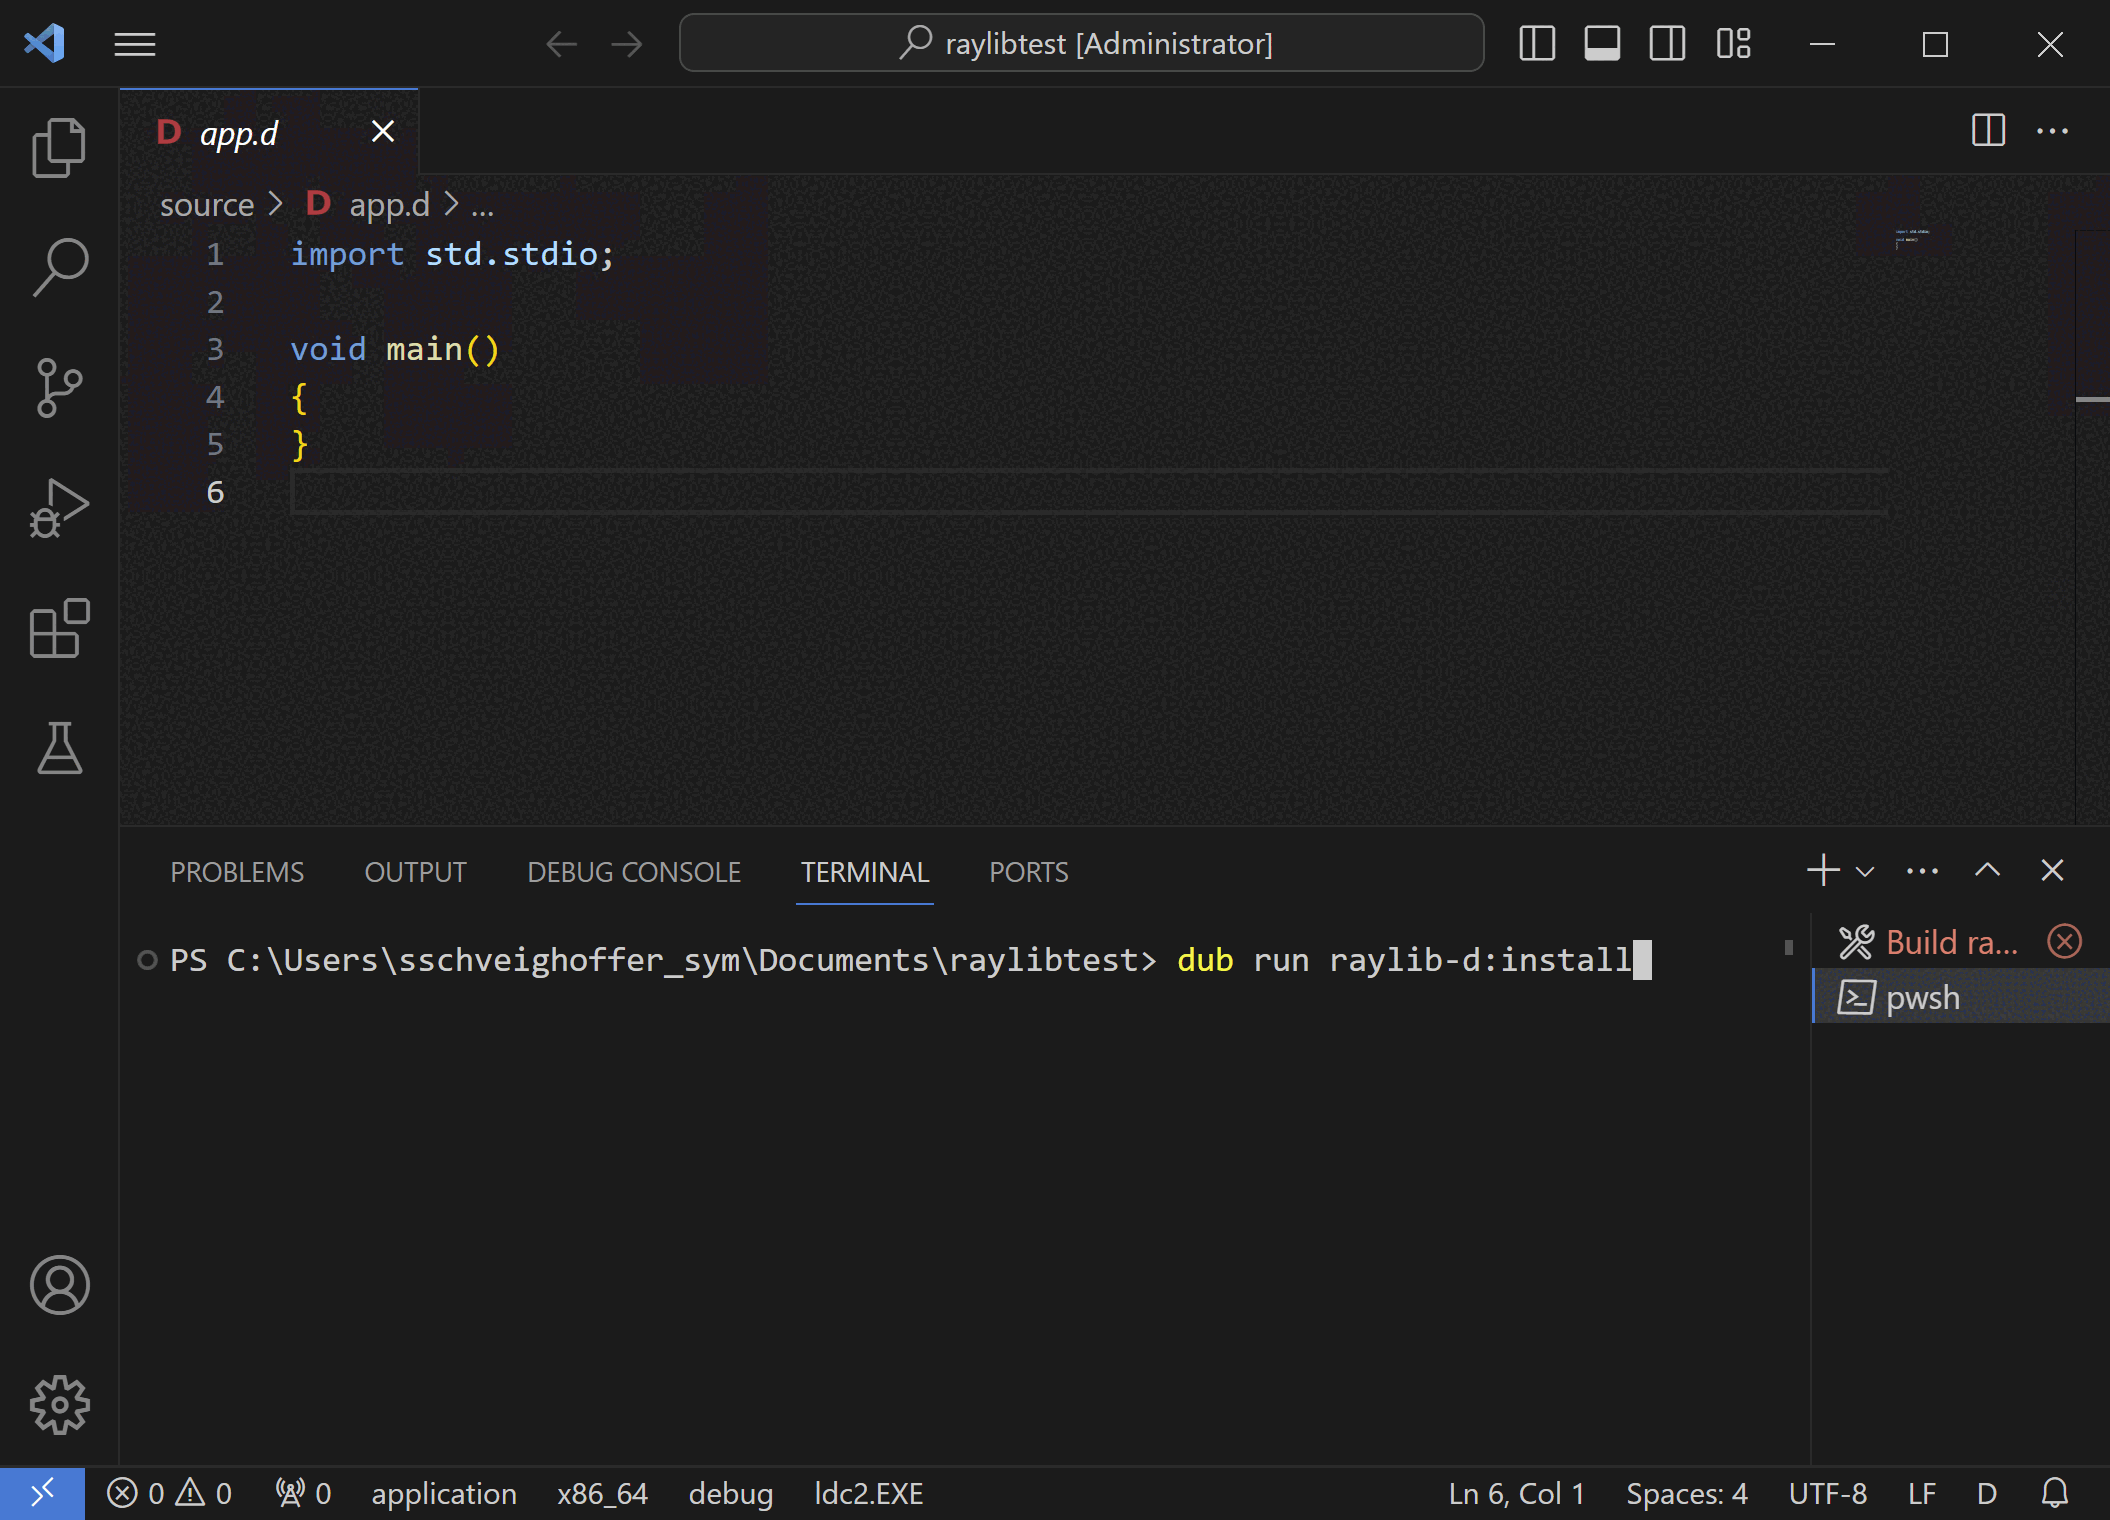
After the terminal comes up, type in dub run raylib-d:install and press enter. The library will install, and then it will ask you if you want to update your dub.json file. Answer "y", and hit enter, and verify that it says it changed your dub.json file.
7. Build successfully
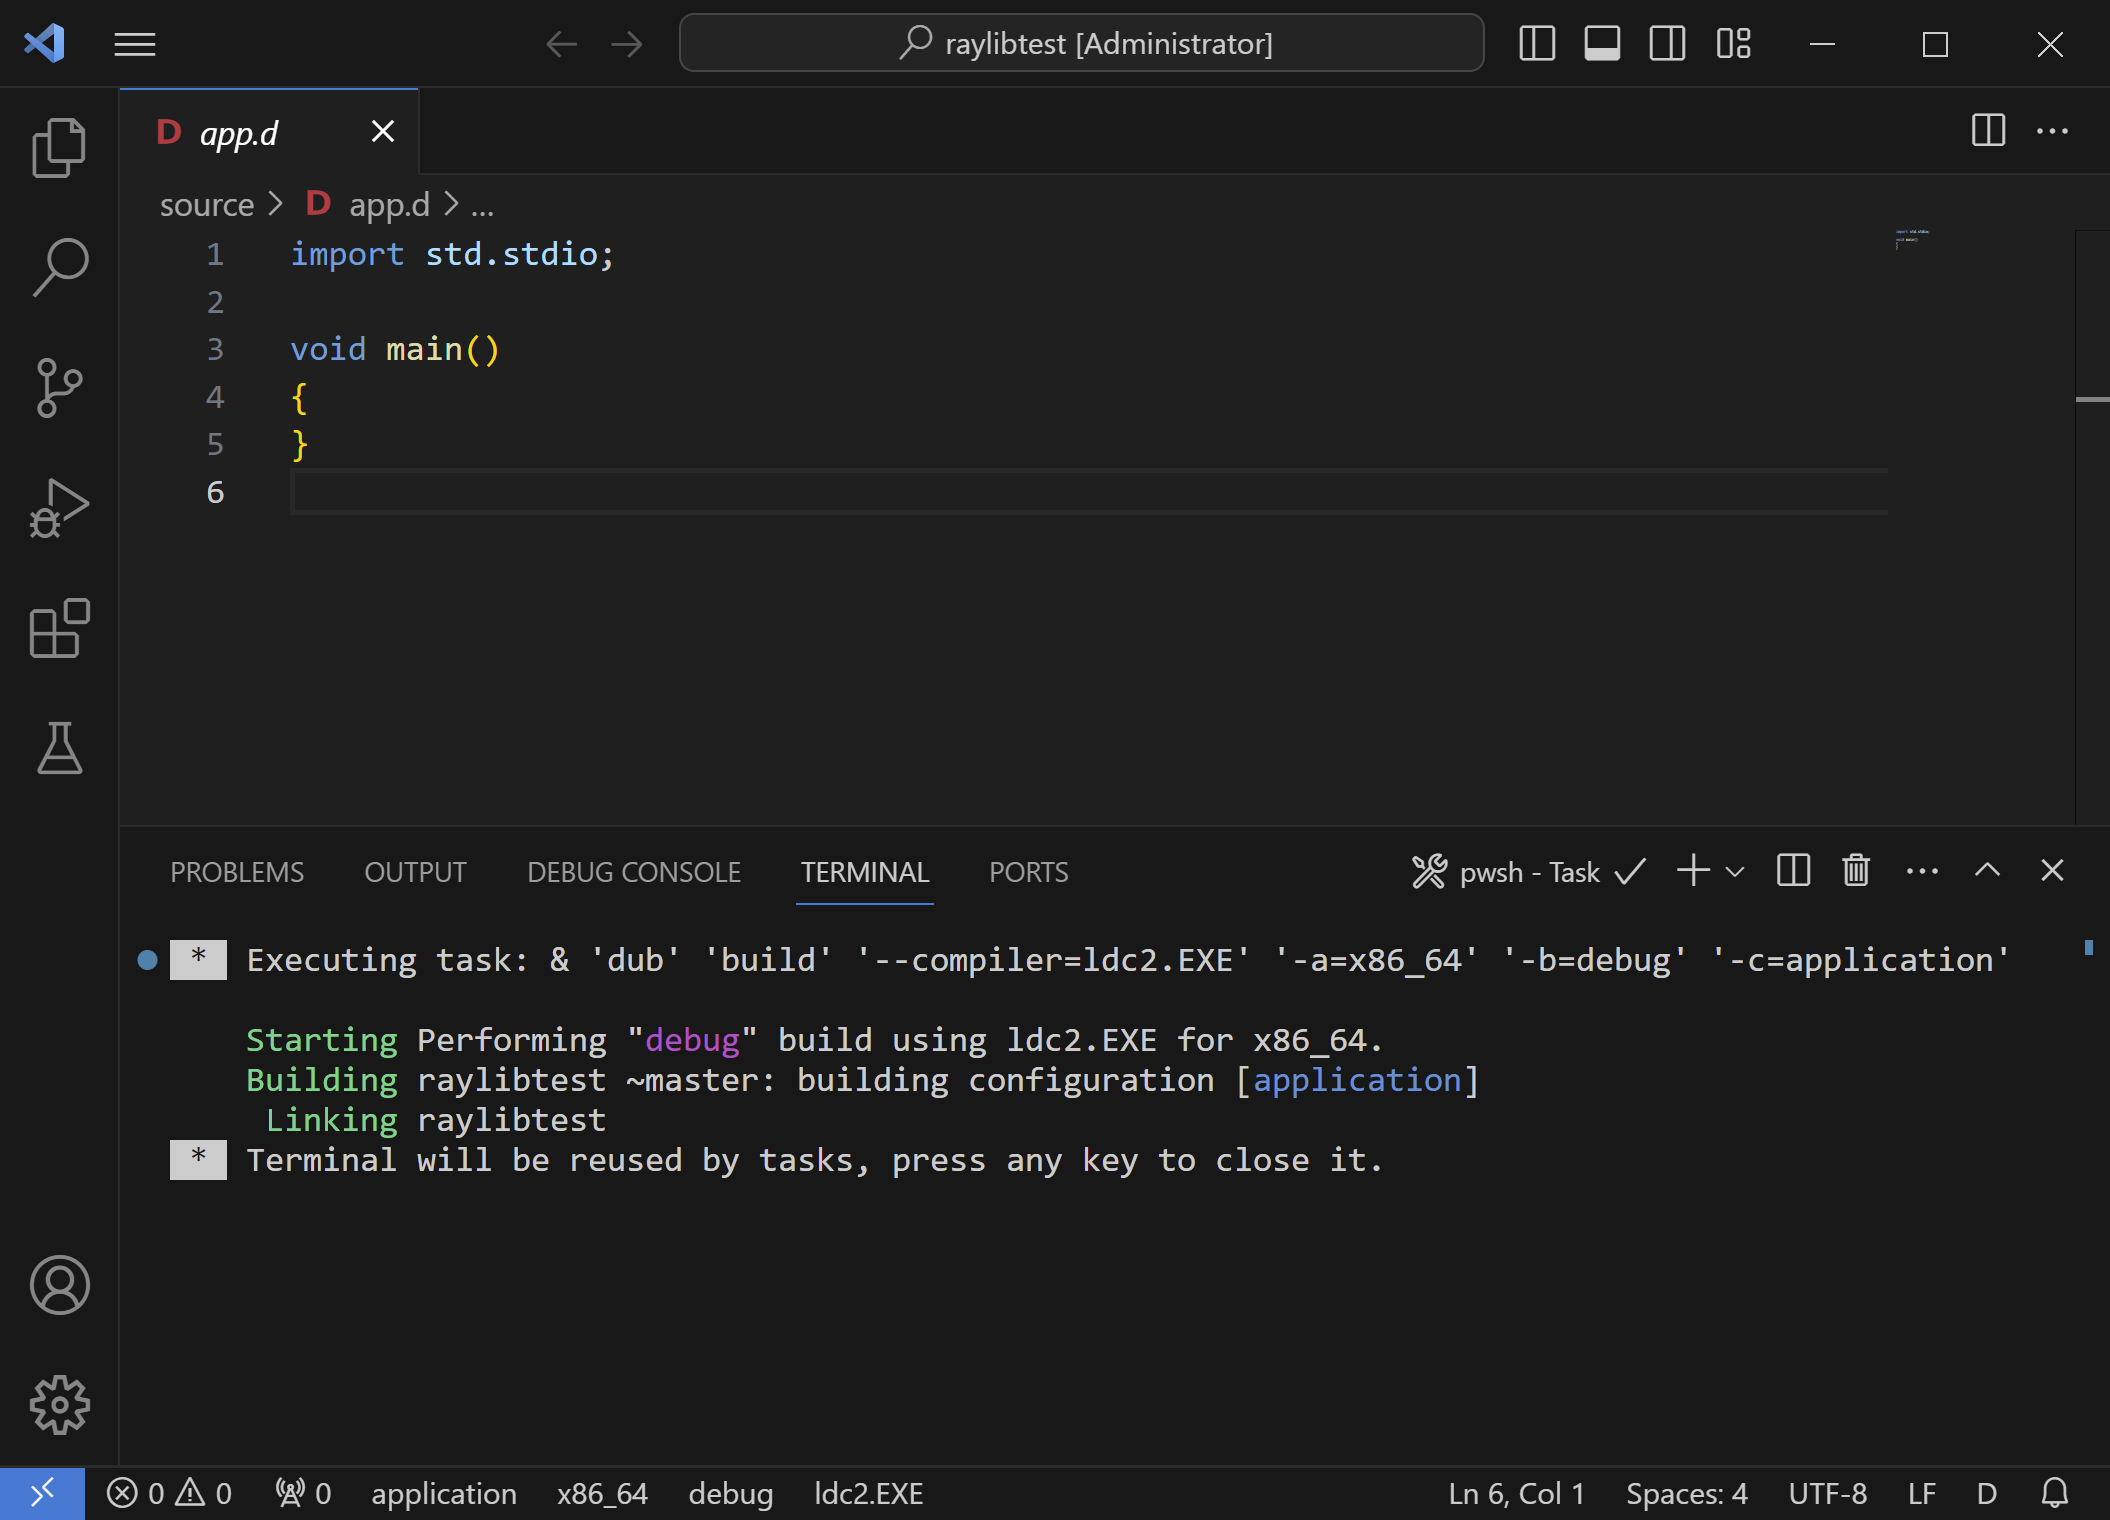
Run the build command again: SHIFT-CONTROL-B, and verify that the build succeeds. If you get no errors, you are ready to create your raylib program!
©2023 Steven Schveighoffer