Installation of the D toolchain on Windows 10 and above
In order to develop using the D programming language, we will be using the following tools. If you feel comfortable with a different development environment, feel free to use those tools instead, but note that the lessons will center on using the tools installed here.
1. Download LDC
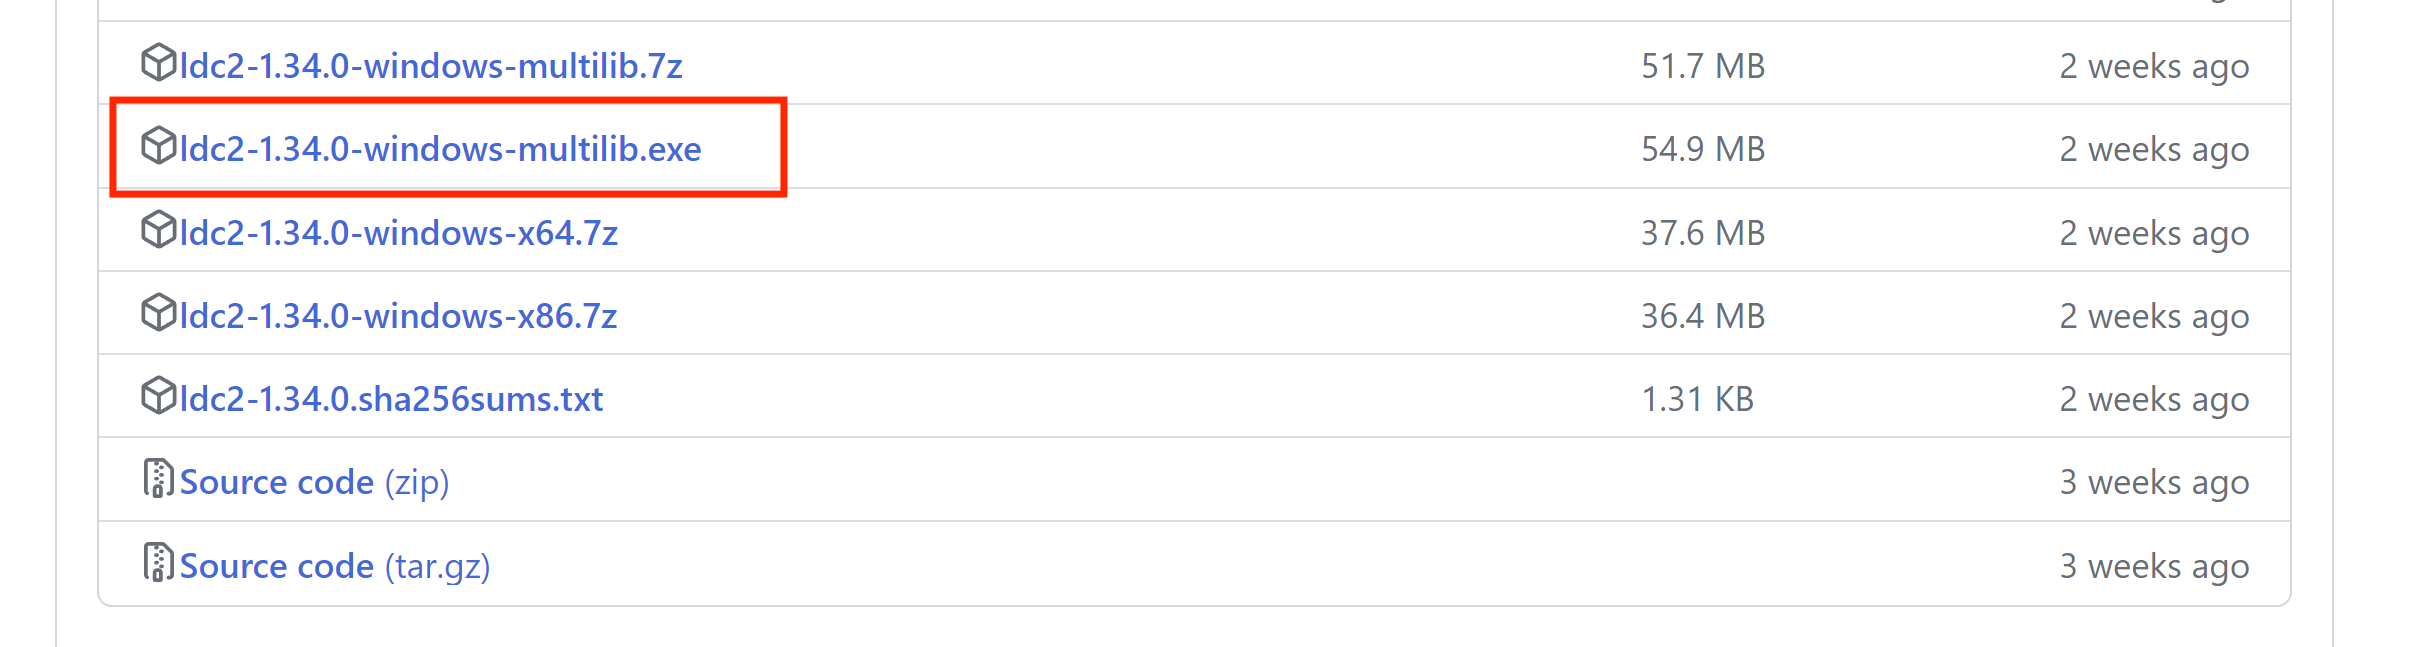
The first thing we will install is the D compiler called LDC. To obtain/install this compiler, please use the following link: https://github.com/ldc-developers/ldc/releases/download/v1.34.0/ldc2-1.34.0-windows-multilib.exe. Note that it's possible a newer version of the compiler is released, and you are free to use that version. To see all the releases, go here.
2. Install LDC

Windows may try to prevent you from installing an unsigned executable. Because the LDC compiler is a free project built by hobbyists, they cannot afford to have Microsoft sign their executables. You may need a parent to do this step, but you should click on the "More info" link, and run the software anyway.
3. Accept the defaults
Accept the defaults for installing LDC, this will put LDC in your path (so it can be found), and make it available for visual studio code to find.
3-a. (Optional) Add LDC to path
If in the previous step you did not have to enter an Administrator account password to install LDC, then you can skip this step
Double check to see that your path has been properly set up to use LDC. To edit your environment variables, use the start menu, then type "environment". Click on the button that says "Edit environment variables for your account", NOT the button that says "Edit the system environment variables".
See if the LDC bin directory is in the path. If not, edit the path, and add the LDC path by clicking the "New" button. If your LDC install is under "C:\Program Files\LDC 1.34", then you would type in "C:\Program Files\LDC 1.34\bin". You can also use the "Browse..." button to find the path. Save by clicking "OK" twice. You may need to log out and log back in for this to take effect.
4. Download Visual Studio Code
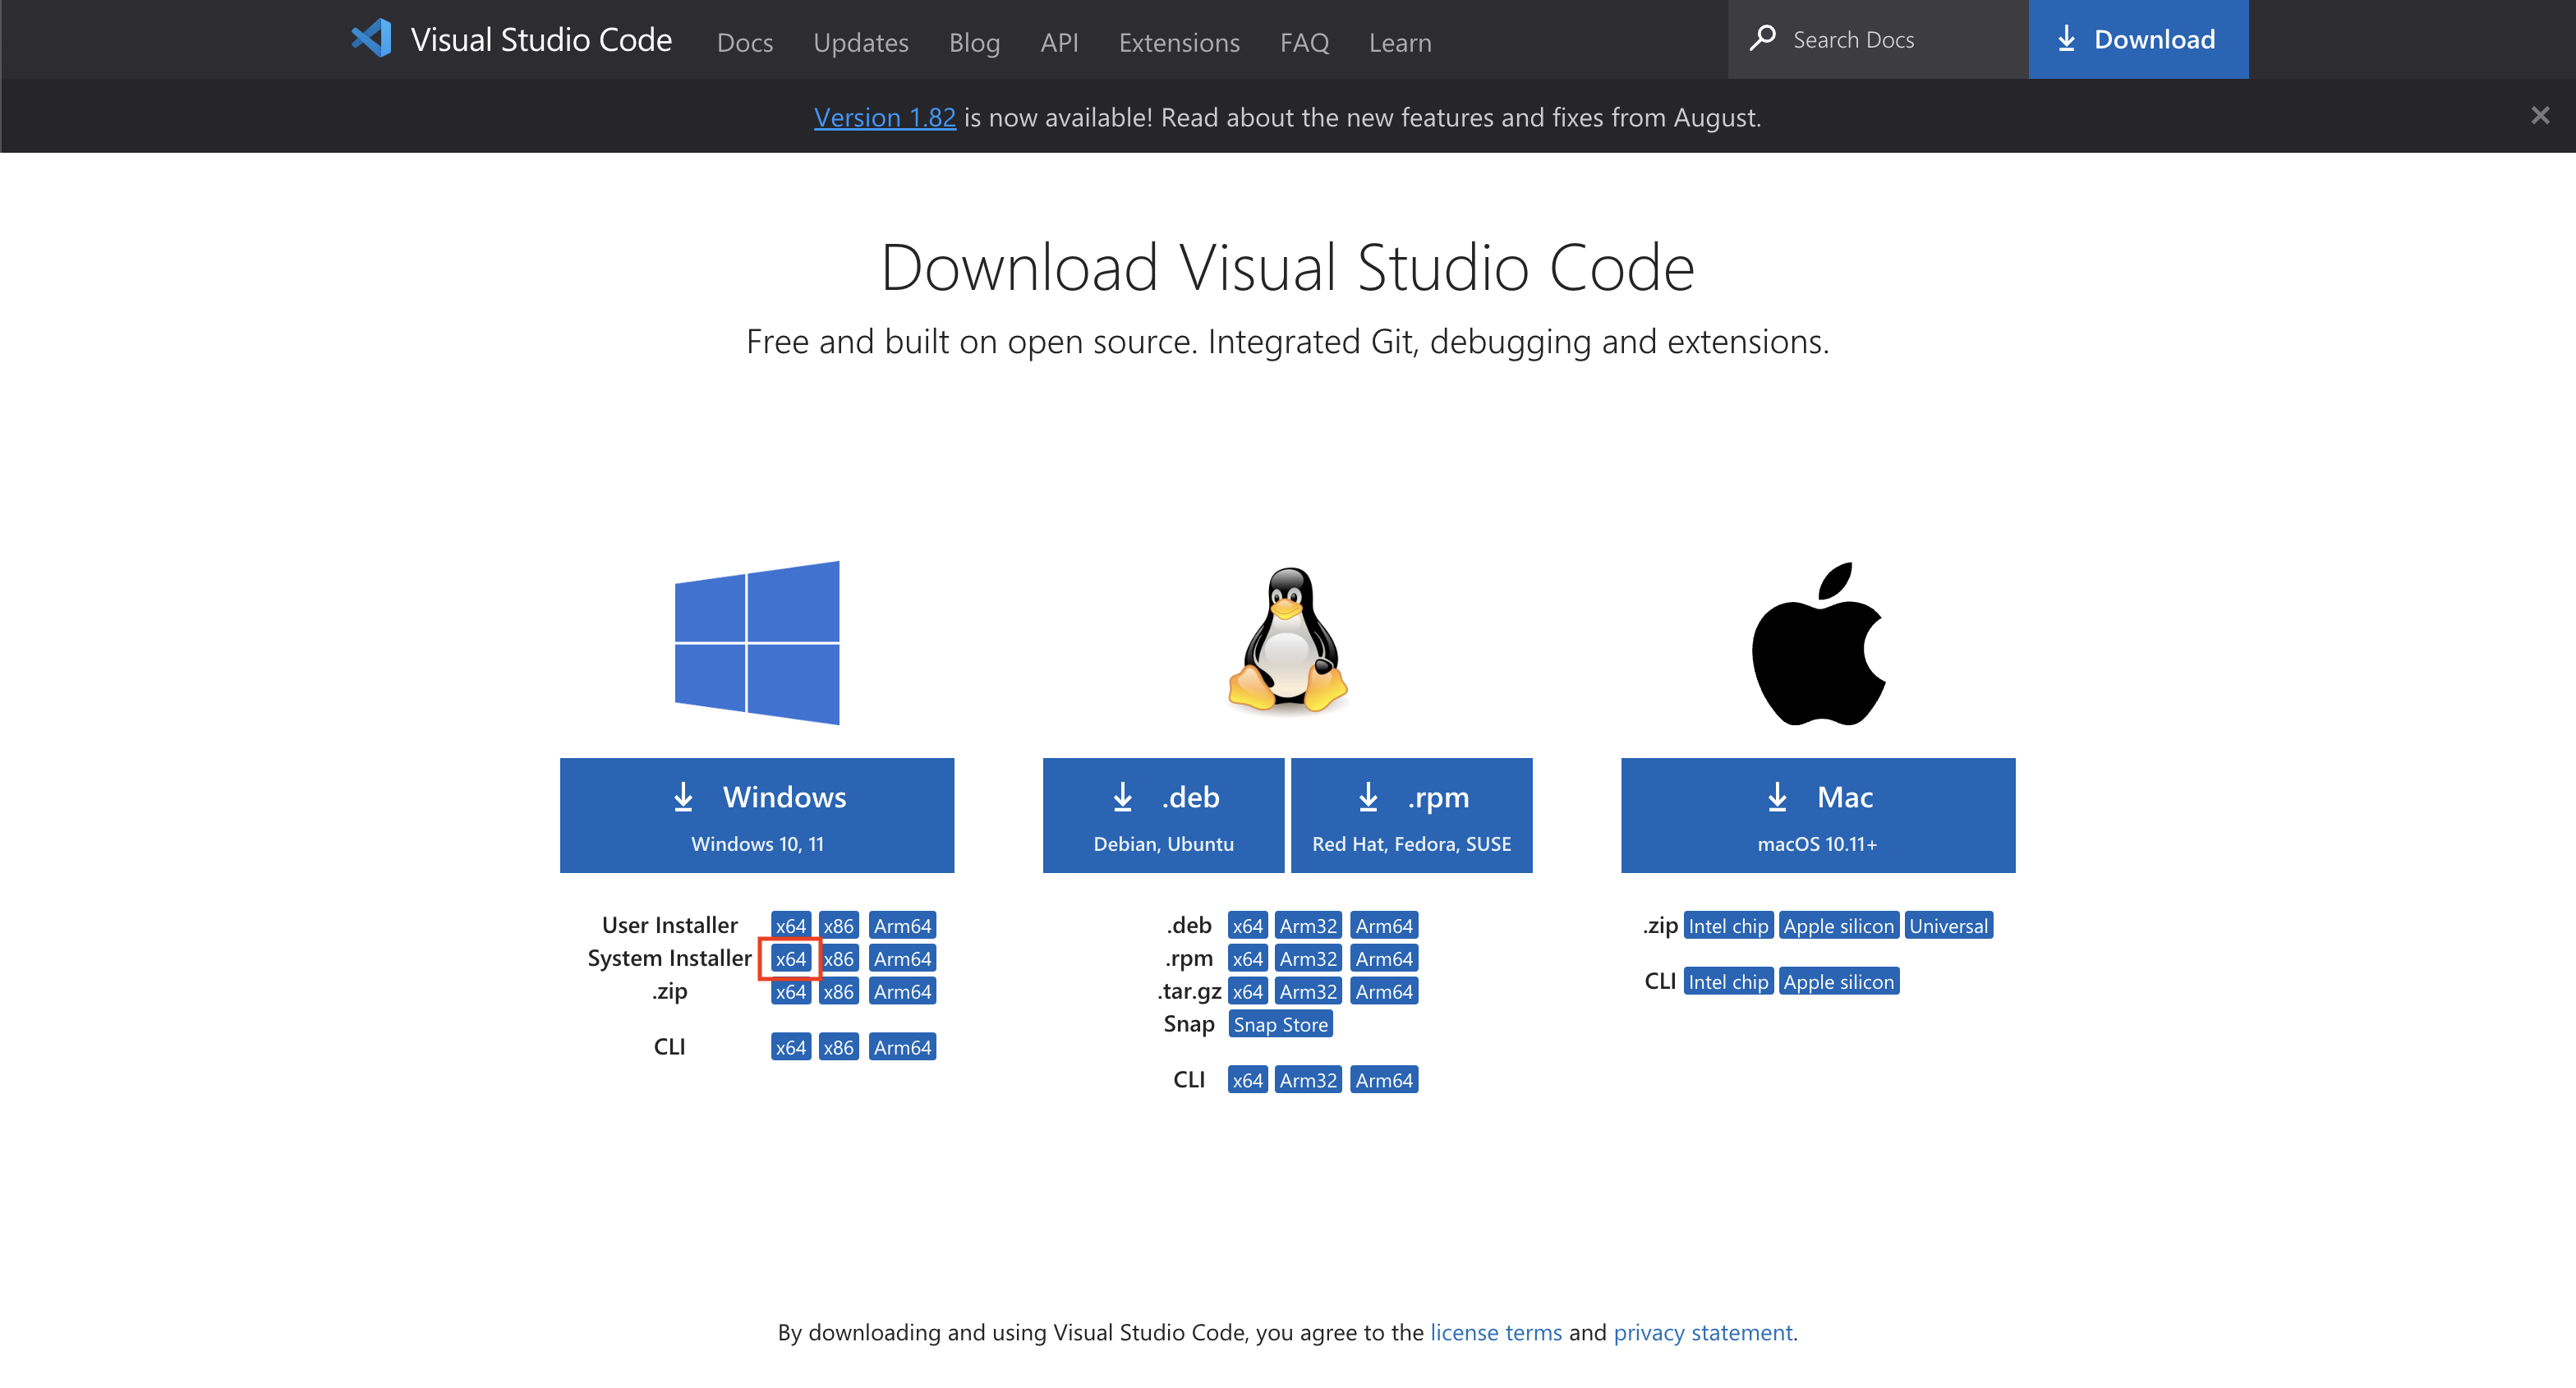
The next tool we will install is Visual Studio Code. This provides the environment we will be using to edit and build our programs in. Using the Download page, you can download the install that is correct for your OS. Note that it is important to download the System install, not the user install. Here is a direct link to the latest download: https://code.visualstudio.com/sha/download?build=stable&os=win32-x64.
5. Install Visual Studio Code
Run the installation that you just downloaded, accepting the license agreement and all the defaults. At the end, this will run visual studio code for the first time. You may need a parent to do this step.
6. Install the VSCode D language extension
Once Visual Studio Code (VSCode for short) is running, we need to install the extension for DLang development. This is done by selecting the extension tab, then searching for "dlang" in the search bar, and finally installing the "D Language utility extension pack", which includes all the things we will need for development.
7. Create a test project
Now that we have all our tools installed, it's time to test that everything is working properly. Before this step, it is HIGHLY RECOMMENDED to reboot your computer. This makes sure all paths and things are set up properly before you try to build and run your first program!
To set up the first D program, you need to create a project directory. We can do this directly in Visual studio code. Open the file browser, and then click "Open Folder".
8. Make a new folder and open it
Using the "New Folder" button as highlighted, make a new folder. I'd recommend it to be in your Documents folder so you can find it easy later on. Let's call it testd. Once the folder is created, click "Select Folder" to open it.
Note: if VSCode asks if you want to trust the directory and/or Documents directory, just go ahead and trust it.
9. Initialize the D project
Now we will ask the D language extension (code-d) to initialize the folder for building. In VSCode, the key sequence for bringing up the "Command palette" or list of commands is SHIFT-CONTROL-P. Press all of those keys together, and a list of commands with a search bar appears. Type in "code-d new", and it will bring up the command to create the empty project. After picking that, select "Empty Console Application".
You may get a notice that "serve-d" is "not installed". Click on the button to install serve-d. This is the piece of the extension which can look up identifiers and help you write your code.
10. Type in the "Hello, World!" program
Select the "app.d" file as shown, and you will have a very minimal working program on the screen. However, we want it to display the "Hello, World!" message on the console. Enter the text below exactly as shown inside the braces of the main function.
writeln("Hello, World!");11. Compile and run your program
To build and run your program, you will use the build command. This is done in VSCode using SHIFT-CONTROL-B. This will bring up the build menu. Select the "build and run" command. If everything works properly, you will see the words "Hello, World!" come out on the console window. Exciting!
If this does not happen, first double check that your code is exactly as written from the previous step. If that is true, please send me a screenshot of the errors that are occurring and I will help you figure out the issue.
©2023 Steven Schveighoffer